
-(2) 10" x 10" squares of fabric. These were left over from my Hunky Dory layer cake for Kiki's quilt. One will be for the outside and one will be for lining.
-Ribbon for outside (optional)
-4" x 7"coordinating scrap fabric for inside pocket (optional)
Here's my 2 fabrics. I started working before I remembered to take the picture!
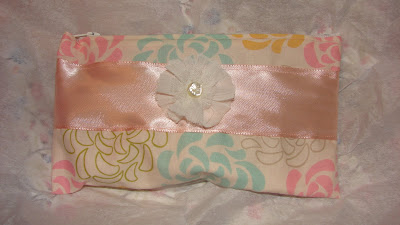
 First you want to pin your ribbon in place on your outer fabric. I cut mine into 2 separate pieces and placed them. You could get really creative and zig-zag them around, but this one is for my mom, so I stayed pretty traditional. Make sure the ribbons will line up with each other once the fabric is folded in half. Sew them in place with a straight stitch in coordinating thread.
  I folded it in half before sewing just to double check that they matched up with each other:
Next, take your scrap fabric for the pocket and press under a quarter of an inch on all sides, and do a quick straight stitch down each one.
 Then pin it on your lining fabric and sew on three sides:
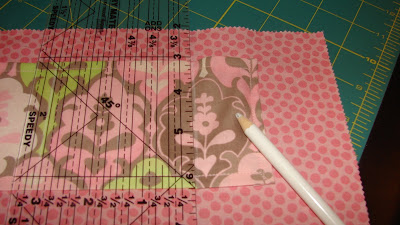
 I used a chalk pencil to make a line about every inch and a half. This gives you some cute little pockets just the right size for lipsticks. Sew down each of these lines with a straight stitch.
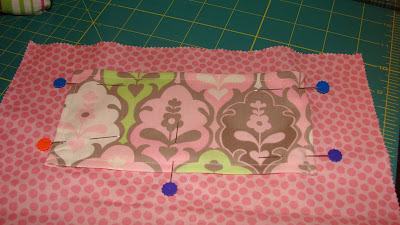
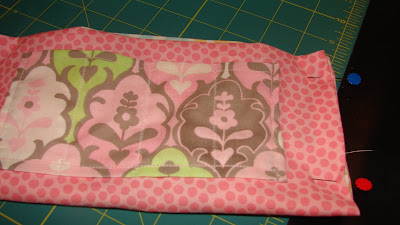
 Next, put your two fabrics together, right sides facing. Pin them along the sides and sew with a straight stitch (quarter of an inch seam allowance). Leave the top and bottom (where you will be putting the zipper) open:
 Now you should have a nice little rube. Fold down a quarter of an inch on the top and bottom and press:
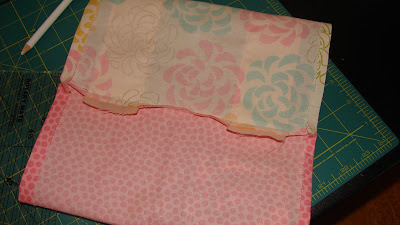 Close-up of the quarter of an inch fold:
 Next, fold the bag in half, with the lining on the outside. Pin the sides.
 Now sew down each side. This will leave you with an almost finished looking bag, but it will be inside out:
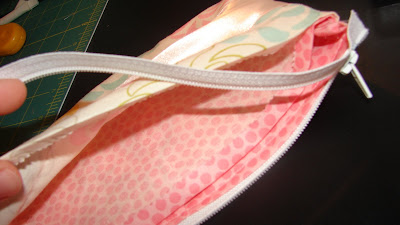
 Now we are going to add the zipper. I have never worked with zippers before, but luckily it turned out okay. You might need to trim yours a bit to make it fit your bag, but generally a 7" zipper will work. Turn your bag right side out. Stick the fabric side of your zipper into the opening between the outer fabric and the lining. The fabric should still be turned down a quarter of an inch from before. You might need to unzip the zipper to give you more play. Use a straight topstich to sew it in place (sorry for the poor picture quality):
 Stitch as much as you can without running into the zipper and breaking your needle (I did). You can always sew up the rest by hand later. Now do the same with the other side of the zipper:
 I had quite a gap after sewing (below). But instead of risking another needle, I just stitched it closed by hand:
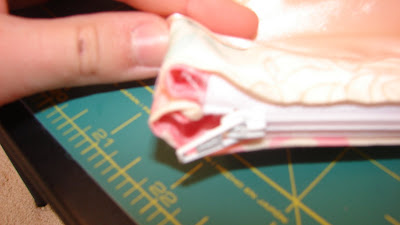 And now you are done! It would be kind of cute to add some fabric flowers to it as well, depending on how dressy you want to get! I added that cute little fabric flower in the top photo at the last minute (I can never stop adding to things).
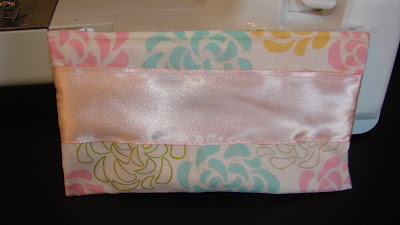 The inside pocket:
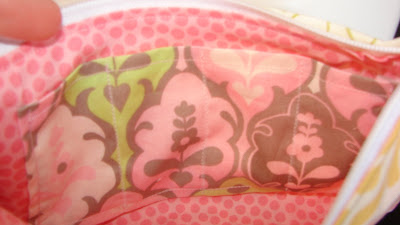
 Then pin it on your lining fabric and sew on three sides:
 I used a chalk pencil to make a line about every inch and a half. This gives you some cute little pockets just the right size for lipsticks. Sew down each of these lines with a straight stitch.
 Next, put your two fabrics together, right sides facing. Pin them along the sides and sew with a straight stitch (quarter of an inch seam allowance). Leave the top and bottom (where you will be putting the zipper) open:
 Now you should have a nice little rube. Fold down a quarter of an inch on the top and bottom and press:
 Close-up of the quarter of an inch fold:
 Next, fold the bag in half, with the lining on the outside. Pin the sides.
 Now sew down each side. This will leave you with an almost finished looking bag, but it will be inside out:
 Now we are going to add the zipper. I have never worked with zippers before, but luckily it turned out okay. You might need to trim yours a bit to make it fit your bag, but generally a 7" zipper will work. Turn your bag right side out. Stick the fabric side of your zipper into the opening between the outer fabric and the lining. The fabric should still be turned down a quarter of an inch from before. You might need to unzip the zipper to give you more play. Use a straight topstich to sew it in place (sorry for the poor picture quality):
 Stitch as much as you can without running into the zipper and breaking your needle (I did). You can always sew up the rest by hand later. Now do the same with the other side of the zipper:I had quite a gap after sewing (below). But instead of risking another needle, I just stitched it closed by hand:And now you are done! It would be kind of cute to add some fabric flowers to it as well, depending on how dressy you want to get! I added that cute little fabric flower in the top photo at the last minute (I can never stop adding to things).The inside pocket:
Way too cute! Thanks for the tutorial, now that school is over I have time to start working on these things again, can't wait to get back to my sewing machine :)
ReplyDelete